It is common knowledge that the older we get the more like our parents we become, so DNA dictates that the older I get, the more interested I am in showing my love through food (thanks Dad!) and the more likely it gets that I will learn to put together a beautiful garden (courtesy of my Mom). It’s true, it’s happening. But when I catch myself saying things like “Shut the door! I am not paying to air condition the whole neighborhood!” I get a little spooked.
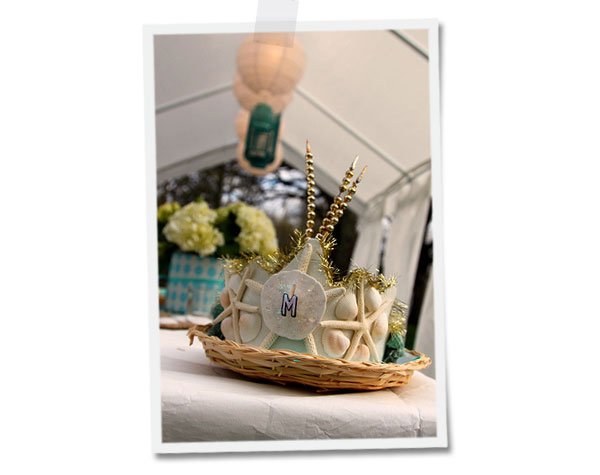
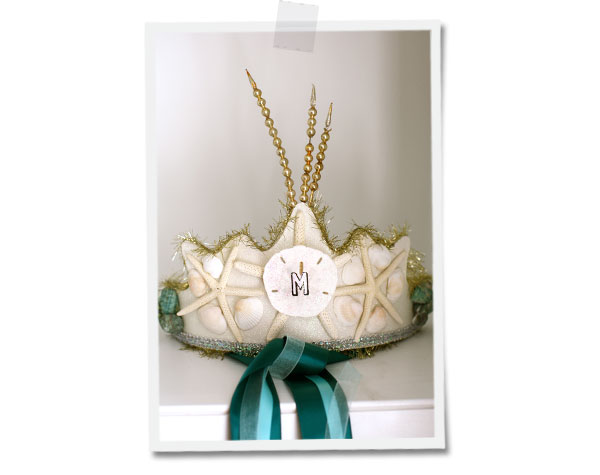
But the truth is that if I have a crafty bone in my whole body, and I may have a few, they are without question gifts from my mother. My mom could make a suitable wedding dress out of toilet paper and bobby pins, and though the occasion did not require that level of ingenuity, when Molly’s birthday rolled around I wanted to do something a little goofy and a little special for her big day. I thought about what my Mom would do and tried to channel all of her “ya-ya” creativity. I decided that a really special occasion requires a headdress, and for this beachy bonanza…a mermaid’s headdress. I think my Mom would be pretty proud of what I came up with, and Molly danced the night away in hers…so all in all, success!
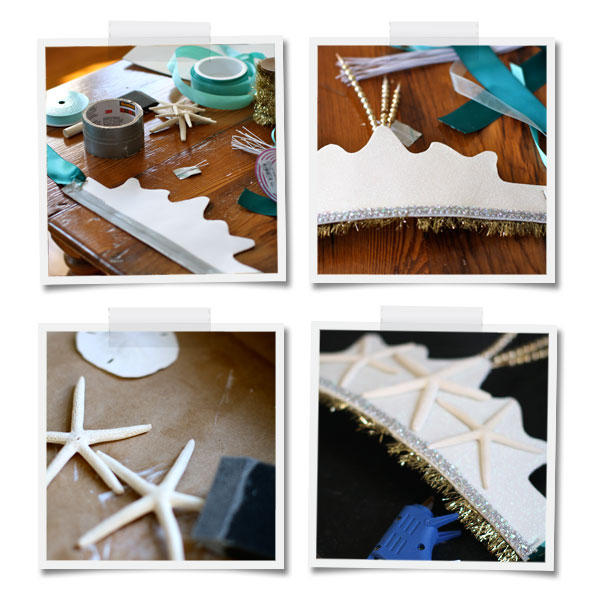
Here’s what you will need to make one of your own:
1.) Scissors
2.) Glue Gun
3.) Glitter (Glitter Glue is easier)
4.) Stapler
5.) A few starfish and a sand dollar
6.) assorted small shells or embellishments
7.) Gel Matte Medium (Modge Podge works well) and a brush ( I like foam)
8.) Florist Stem Wire
9.) Fancy trimmings
10.) Ribbon (a few colors and sizes)
11.) Sticky-back Glitter Foam sheets (x2)
Not pictured: pencil, duct tape

Instructions:
Before you begin, grab your brush and brush a thin coat of gel matte medium on the front and backsides of your starfish and sand dollars (if they are real). Set them aside to dry. This will help seal them so they don’t flake or discolor…or you know, attract critters.
Take one piece of foam and trace your crown shape on the paperback side (I laid out my starfish and loosely traced around them). Cut out your shape, then lay it down on your second piece of foam (glitter sides out) and trace it. Cut out your second piece and set aside.
Cut your ribbons so that you have two sets that when attached to either end of your headdress, will tie in a generous bow at the back of the head (I made mine about 12″ each). Stack one set of ribbons and fold over the ends about .5″. Staple folded end to the back side of your first cut piece of foam (glitter side out …obviously!). Make sure staples go all the way through, you can reinforce by stapling from both sides, as you will cover the staples later. Repeat this on the other end of the headdress.
With ribbons attached, take 3 or 4 strands of florist’s stem wire and lay at the bottom edge of your crown piece. Neatly tape over them with duct tape and make sure they are secure. Trim the ends so nothing sticks past the sides. You can now bend and shape your headdress to fit your head.
Run a bead of hot glue along the bottom edge of the crown on the backside and affix fancy trim so it sticks out beyond the edge. If you have any other embellishments that will need to be extra secure or stick out from the back, add them now, securing with hot glue and/or duct tape.
Now take your second piece of cut foam, remove the paperback (only from this side), match up to the first side and press them together. For added support you can put some hot glue between them first. If your two foam pieces don’t match up exactly, trim them at this point to match.
If you have any further trimmings, hot glue them to the front and edges, running your finger over them so they are smooth.
Shape your headdress into a gentle curve and begin to affix your starfish, shells and sand dollars with hot glue. Embellish and bedazzle to your heart’s content and don’t forget to glitter!!
Tie it to your pretty head and dance around!

What would you make a headdress for? Do tell!
xoxo
